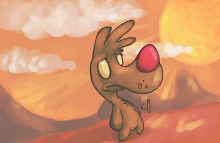
Here's an early progress shot of the foamed puppet. Notice the one pink foot (this was a test)
Here's the very first test I did where I removed the rig. happy with the result of this test, you cant' really see any reminiscence of the rig.
Here's the puppet with a few more facial details. The teeth and nose were made from normal oven bake sculpey. The ears, tongue and eyelids were made from bendable sculpey. The ears were a little too thick to be able to bend the ears themselves, but I can still move them from the point where the wire connects to the head. Also, I thought they looked a little odd just fleshy like that and I decided to add some fur backing to them later on, which was a diversion from the original design.
Here's a pic showing all the eyelids, just as they came out of the oven. That setence sounds quite wrong. Haha. Anyway, I needed to use replacement eyelids because the bendable sclupey didnt really morph as much as I thought it would out of the oven. Still, this option is okay and it looked good on the puppet.
I decided to paint the eyelids and glue some fur onto them just so they looked more natural.
Here's the puppet's features painted and glazed.
Close up. If you notice the tongue is movable and can also bend. I put wire inside it!
Next it was time to fur the puppet. Which was quite a lengthy process. Here you can see an extremely strange shot of him covered in tape and markings for the pattern to cut. It's easier to do this way!
I cut off the tape and put it into invididual pieces. This must be done or to get the form right.
The patten drawn onto the back of the fabric. I had to make sure the fur was going the right way for all the features.
Here's the head and the tail furred. Both of the fur is the same material. The face looked VERY strange before I trimmed and shaved it. I should have gotten a photo; he looked like one of those shaggy dogs. Anyway, shaving the fur was what probably took me the longest. Still, worth the effort.
Also note that I entwined the puppet with string. This was mostly because the foam was a bit bulky and he was looking a bit round when I put the fur on to test in some areas. They also work a little bit like tendons for the arms and legs.. It was like making veins for the creature.
Here's the sewed patterns of the back and stomach. All hand sewn! :)
Progress of sewing on the first leg. The legs were shaved too.
After all the fur was applied I put tape on him in the form of stripes and spots. But you can see there is still some colour in the longer parts of the fur.
Here's me using a copic airbrush to get some more colour onto the character. The airbrush works by transferring the ink from a copic marker by using canned air.
Some progress of the airbrushing.
And finally.. HE'S FINISHED!!!!
There are a few things I'd still like to try and do if I can.. I'd like it if I could find some whiskers for him somewhere. Also, there's a few touchups I need to do inside the mouth.
I want to note that the mouth doesn't fully close with is an issue. I'll probably have to use pins to shut it when I'm filming it next semester.
